- Published on
Setup Sublime Text
Sublime Text ကို Laravel development အတွက် setup လုပ်ပါမယ်။ အခု setup လုပ်မယ့်ထဲမှာပါတဲ့ feature တချို့ကို အရင်ပြချင်ပါတယ်။
Parameter Hints

Go To definition

Error Detection
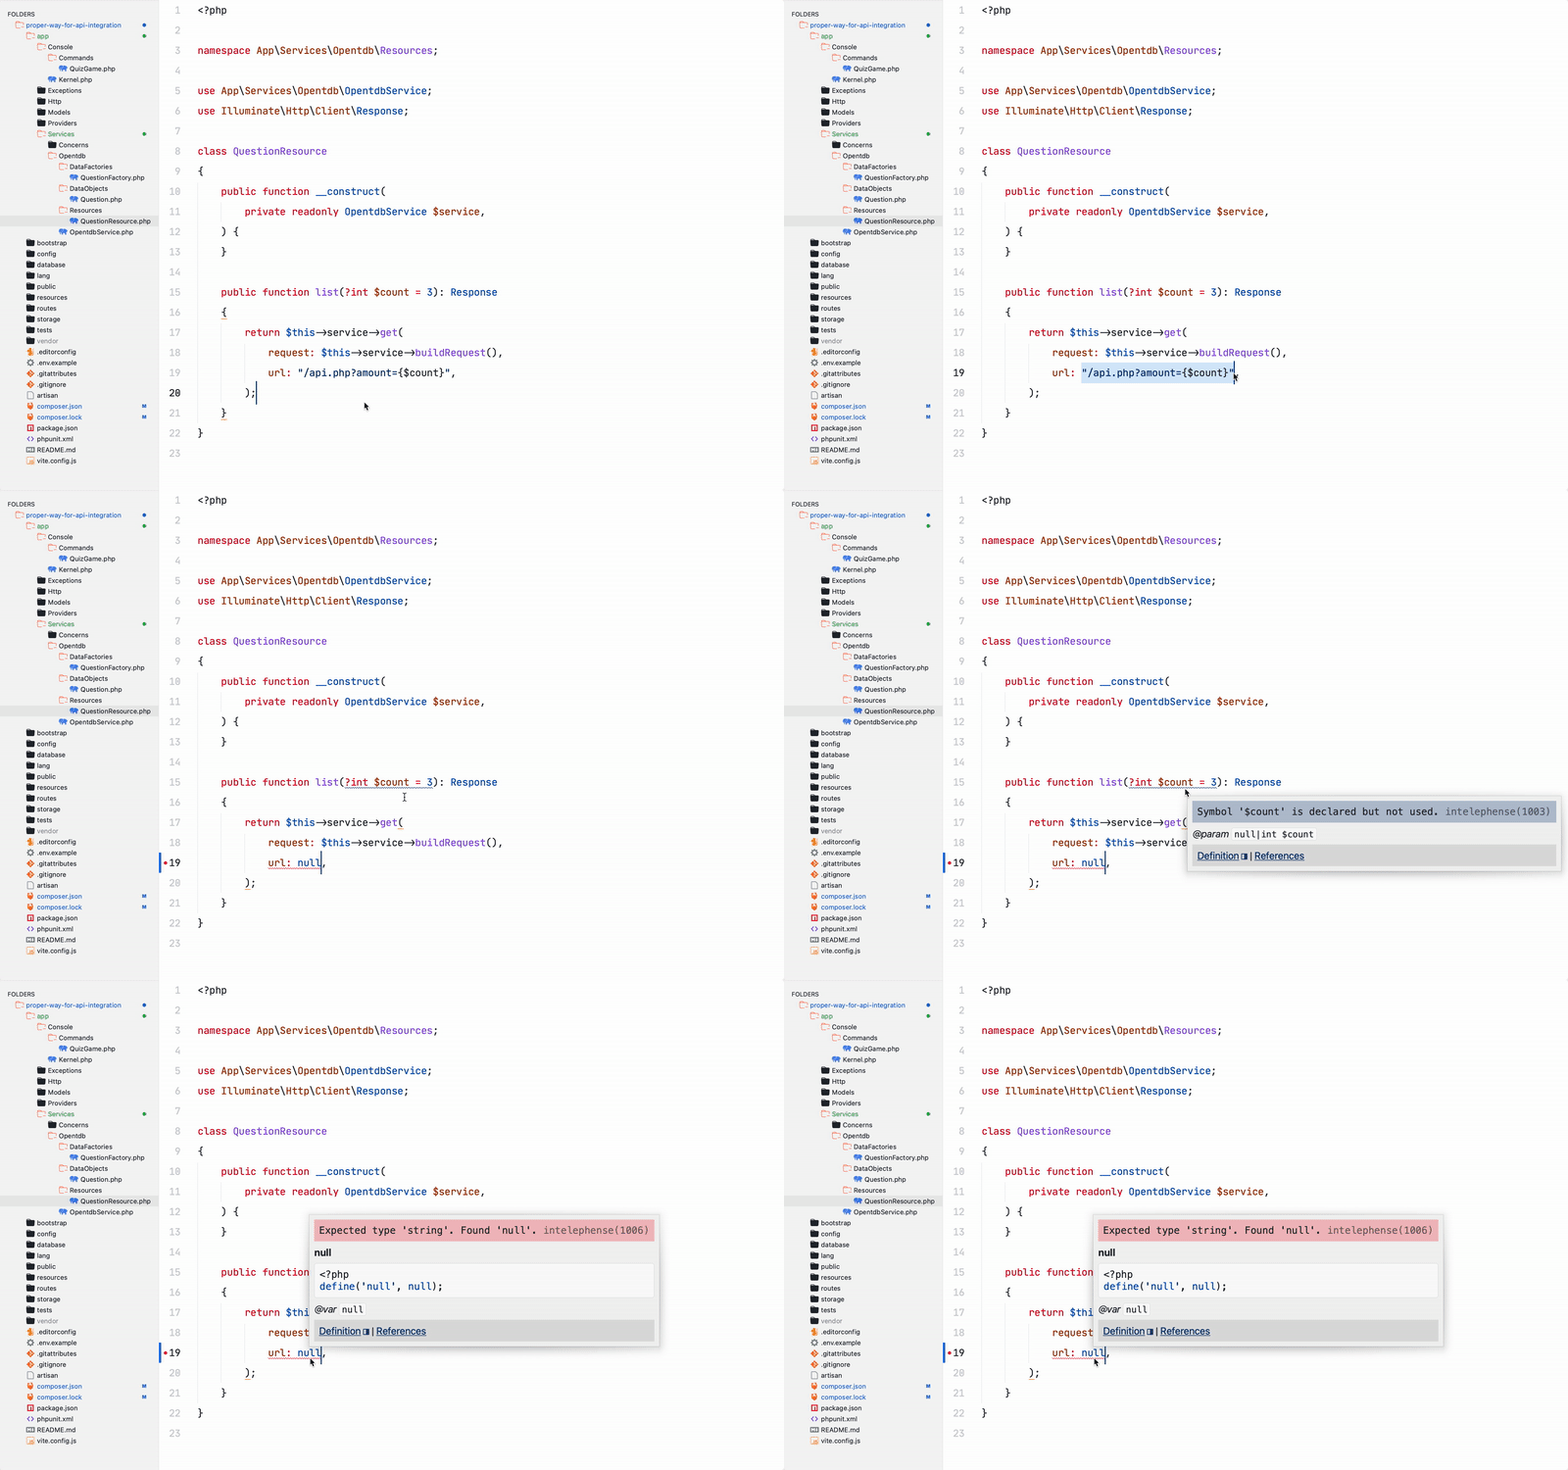
Code Completion

Basic
Sublime ကိုသုံးပြီဆိုတာနဲ့ Package Control ကို အရင်ဆုံး install လုပ်ရပါမယ်။ Install လုပ်ဖို့အတွက် Command Palette ကိုဖွင့်ရပါမယ်။ Mac မှာဆိုရင် cmd+shift+p, Linux/Win မှာဆိုရင် ctrl+shift+p နှိပ်ရမှာပါ။ ပြီးရင် Install Package Control လို့ရှာပြီး enter နှိပ်ပါမယ်။ ဒါဆိုရင် Package Control ကနေ package တွေသွင်းလို့ရပါပြီ။
Command Palette -> Install Package ControlSublime မှာ setting တွေပြင်မယ်ဆိုရင် cmd+, ကို နှိပ်ပေးရပါမယ် (Linux/Win ဆိုရင် cmd နေရာမှာ ctrl လိုယူဆပေးပါ)။ ဒါဆိုရင် setting တွေသိမ်းထားတဲ့ json file ကို ဖွင့်ပေးမှာပါ။
Apperance
ကျွန်တော်အတွက်တော့ editor က ကြည့်ကောင်းဖို့ အရမ်းအရေးကြီးပါတယ်။

GitHub's Theme ကို Package Control ကနေသွင်းပါမယ်။
Command Palette -> Package Control: Install Package -> GitHub ThemeUI မှာ GitHub Light ကို ရွေးပါမယ်။
Command Palette -> UI: Select Theme -> GitHub LightColor Scheme မှာလည်း GitHub Light ကို ရွေးပါမယ်။
Command Palette -> UI: Select Color Scheme -> GitHub Lightဒီနေရာမှာ dark mode ကြိုက်တဲ့သူတွေကတော့ dark mode ကိုရွေးလို့ရပါတယ်။
ပြီးရင်တော့ setting မှာ အခုလို update လုပ်ပါမယ်။ Font ကတော့ အဆင်ပြေတာသုံးလို့ရပါတယ်။
{
  "ignored_packages": ["Vintage"],
  "color_scheme": "Packages/GitHub Theme/schemes/GitHub Light.sublime-color-scheme",
  "theme": "GitHub Adaptive.sublime-theme",
  "font_face": "JetBrains Mono",
  "font_size": 18,
  "line_padding_bottom": 7,
  "line_padding_top": 7,
  "caret_extra_bottom": 12,
  "caret_extra_top": 12,
  "hide_tab_scrolling_buttons": true,
  "highlight_line": false,
  "highlight_gutter": false,
  "margin": 10,
  "mini_diff": "auto"
}
Sidebar က file icon တွေအတွက် A File Icon ကို install လုပ်ပါမယ်။
Command Palette -> Package Control: Install Package -> A File Iconပြီးရင် sublime ကို restart လုပ်ရင် ရပါပြီ။ ဒီနေရာမှာ ကျွန်တော်ကတော့ minimap၊ tabs နဲ့ status bar ကိုဖျောက်ထားပါတယ်။ File တွေကို cmd+p နဲ့ပဲ nagivate လုပ်ပါတယ်။
LSP
LSP ဆိုတာကတော့ Language Server Protocol ပါ။ သူက language server ရဲ့ auto complete၊ go to definition နဲ့ find all references စတာတွေကို ကြားကနေ editor ကိုပို့ပေးပါတယ်။
LSP ကို Package Control ကနေသွင်းပါမယ်။
Command Palette -> Package Control: Install Package -> LSPပြီးရင် php အတွက် LSP-intelephense ကိုထပ်သွင်းပါမယ်။
Command Palette -> Package Control: Install Package -> LSP-intelephenseဒါဆိုရင် Code completion၊ Signature help၊ Go to definition၊ Find all references၊ Diagnostics စတဲ့ feature တွေအကုန်ရပါပြီ။
LSP ရဲ့ error ပြတဲ့ UI အတွက် setting တွေ update လုပ်ပါမယ်။ (Optional)
Command Palette -> Preferences: LSP Settings{
"lsp_format_on_save": true,
"show_diagnostics_panel_on_save": 0,
"diagnostics_gutter_marker": "dot",
"document_highlight_style": "",
"diagnostics_highlight_style": {
"error": "squiggly",
"warning": "squiggly",
"info": "squiggly",
"hint": "squiggly"
}
}PHP Companion
PHP Companion ကလည်း sublime မှာ php ရေးရင် မရှိမဖြစ် package တစ်ခုပါ။ Package Control ကနေပဲ install လုပ်ပါမယ်။
Command Palette -> Package Control: Install Package -> PHP Companionသူမှာ default Keybinding မပါပါဘူး။ ကိုယ့်ဘာသာထည့်ပေးရမှာပါ။
Keybinding
Go to definition တို့၊ find all references တို့ကို UI ကနေမလုပ်ဘဲ keyborad shortcut ကနေ လုပ်လို့ရအောင် keybinding ထည့်ပေးဖို့လိုပါတယ်။
Keybinding ကို
Command Palette -> Preferences: Key Bindingsကနေဖွင့်လို့ရပါတယ်။
[
  {
    "keys": ["alt+i"],
    "command": "find_use"
  },
  {
    "keys": ["alt+n"],
    "command": "import_namespace"
  },
  {
    "keys": ["alt+g"],
    "command": "lsp_symbol_definition",
    "args": {
      "side_by_side": false,
      "force_group": true,
      "fallback": false,
      "group": -1
    },
    "context": [
      {
        "key": "lsp.session_with_capability",
        "operand": "definitionProvider"
      },
      {
        "key": "auto_complete_visible",
        "operand": false
      }
    ]
  },
  {
    "keys": ["alt+shift+g"],
    "command": "lsp_symbol_definition",
    "args": {
      "side_by_side": true,
      "force_group": true,
      "fallback": false,
      "group": -1
    },
    "context": [
      {
        "key": "lsp.session_with_capability",
        "operand": "definitionProvider"
      },
      {
        "key": "auto_complete_visible",
        "operand": false
      }
    ]
  },
  {
    "keys": ["alt+r"],
    "command": "lsp_symbol_references",
    "args": {
      "side_by_side": true,
      "fallback": false
    },
    "context": [
      {
        "key": "lsp.session_with_capability",
        "operand": "referencesProvider"
      }
    ]
  }
]
option+i ကို နှိပ်ရင် calss ကိုရှာပြီး auto use ပေးမှာပါ။ (Linux/Win ဆိုရင် option နေရာမှာ alt လိုယူဆပေးပါ။)
option+n ကို နှိပ်ရင် လက်ရှိရောက်နေတဲ့ namespace ကို generate ထုတ်ပေးမှာပါ။
option+g ကို နှိပ်ရင် Go to difinition လုပ်ပေးမှာပါ။
shift+option+g ကတော့ option+g နဲ့ တူတူပါပဲ ဒါပေမဲ့ file ကိုမဖွင့်ပဲ ဘေးမှာ preview ပြပေးမှာပါ။
option+r ကိုနှိပ်ရင် find all references လုပ်ပေးမှာပါ။
ဒီနေရာမှာ option အစား window (သို့) cmd ကိုသုံးချင်ရင် keybinding မှာ alt အစား super လို့သုံးလို့ရပါတယ်။
Laravel IDE Helper
Laravel မှာ auth()->user()->update(['foo' => 'barr']); လို့ရေးတာမျိုးတွေကို error မပြစေချင်ရင် Laravel IDE Helper သွင်းထားဖို့လိုပါတယ်။
ဒီလောက်ဆိုရင် Sublime Text ကို Laravel Development အတွက် အဆင်ပြေပြေသုံးလို့ ရမယ်လို့ ယုံကြည်ပါတယ်။ သိချင်တာရှိလည်း မေးလို့ရပါတယ်ခင်ဗျာ။ Demo ပြထားတဲ့ project ကို ဒီကနေ clone လို့ရပါတယ်။
Update: 2023-02-24
Variable နဲ့ Class ကို rename လုပ်တာတို့၊ sidebar ကနေ php class file create လုပ်တာတို့ တခြား feature တွေ အများကြီးလိုချင်တဲ့ အတွက် intelephense အစား phpactor ကို ပြောင်းသုံးနေပါတယ်။
Sublime နဲ့ မှာကျွန်တော်သုံးတဲ့ package တွေ၊ config တွေကို ဒီမှာ ပဲ update ဆက်လုပ်သွားပေးပါမယ်။