- Published on
Laravel Zero
Laravel Zero ဆိုတာကတော့ cli application တွေရေးဖို့ ဖန်တီးထားတဲ့ micro-framework တစ်ခုပါ။ Laravel ရဲ့ core developer တစ်ယောက်ဖြစ်တဲ့ Nuno Maduro က ဖန်တီးထားတာပါ။
နမူနာအနေနဲ့ ipinfo ဆိုတဲ့ cli application တစ်ခုရေးပြီး Packagist ကနေ distribute လုပ်ပါမယ်။ ipinfo မှာ ကိုယ့်ရဲ့ current ip information ကို ip-api.com က fetch လုပ်ပြီး cli မှာ ကြည့်ကောင်းမယ့် UI တစ်ခုနဲ့ ပြပါမယ်။
Installation
Composer ကနေတဆင့် install လုပ်ပါမယ်။
composer create-project --prefer-dist laravel-zero/laravel-zero ipinfo
cd ipinfo
php application app:rename ipinfo
ဒါဆိုရင်
php ipinfoဆိုပြီး ခေါ်လို့ရပါပြီ။
Create Command
Code စရေးဖို့ အတွက် laravel မှာလိုပဲ command တစ်ခု create လုပ်ဖို့လိုပါတယ်။
php ipinfo make:command ipinfoဒါဆိုရင် app/Commands/Ipinfo.php ဆိုပြီး file တစ်ခု create လုပ်သွားမှာပါ။
<?php

namespace App\Commands;

use Illuminate\Console\Scheduling\Schedule;
use LaravelZero\Framework\Commands\Command;

class Ipinfo extends Command
{
    /**
     * The signature of the command.
     *
     * @var string
     */
    protected $signature = 'app:ipinfo';

    /**
     * The description of the command.
     *
     * @var string
     */
    protected $description = 'Command description';

    /**
     * Execute the console command.
     *
     * @return mixed
     */
    public function handle()
    {
        //
    }

    /**
     * Define the command's schedule.
     *
     * @param  \Illuminate\Console\Scheduling\Schedule  $schedule
     * @return void
     */
    public function schedule(Schedule $schedule): void
    {
        // $schedule->command(static::class)->everyMinute();
    }
}
ပြီးရင်တော့ $signature မှာ အခုလိုပြင်ပါမယ်။
protected $signature = 'ipinfo';ဒါဆိုရင်တော့ အခုလိုခေါ်လို့ ရပါပြီ။
php ipinfo ipinfoဒါနေရာမှာ ဘာလို့ ipinfo နှစ်ခါဖြစ်နေတာရှင်းပြပါမယ်။ စောနက php application app:rename ipinfo ဆိုပြီး run လိုက်တာက project စသွင်းသွင်းချင်းမှာပါတဲ့ application ဆိုတဲ့ file ကို ipinfo ဆိုပြီး rename ဖြစ်သွားပါတယ်။ php ipinfo ဆိုတာက php hello.php လိုမျိုးတဲ့ သဘောတရားတူပါတယ်။ အခု ipinfo ဆိုတဲ့ file ထဲမှာက framework ကို bootstrap လုပ်တဲ့ code တွေရှိနေတာပါ။ php ipinfo လို့ပဲ run ရင် config/commands.php ထဲက default command ကို run သွားမှာပါ။ အဲ့ဒါကို အခုလိုပြင်လို့ရပါတယ်။
config/commands.php
return [

    'default' => \App\Commands\Ipinfo::class,

    // ...

];
ဒါဆိုရင်တော့
php ipinfoဆိုပြီး run လို့ရပါပြီ။
ip-api
ဒီနေရာမှာ api integration ကို အဓိကပြောချင်တာ မဟုတ်တော့ အခုလို အလွယ်ပဲရေးလိုက်ပါမယ်။
app/Commands/Ipinfo.php
use Illuminate\Support\Facades\Http;

public function handle()
{
    $ipInfo = Http::get('http://ip-api.com/json')->json();
}
ဒီနေရာမှာ Http client က Laravel Zero မှာ buit-in မပါဝင်တဲ့အတွက် အခုလို install လုပ်ပေးဖို့လိုပါတယ်။
php ipinfo app:install httpUI
UI ကို တော့ Termwind နဲ့ ရေးပါမယ်။ Termwind နဲ့ဆိုရင် cli ရဲ့ ui ကို Tailwind CSS လိုမျိုးရေးလို့ရပါတယ်။
app/Commands/Ipinfo.php
use function Termwind\{render};

public function handle()
{
    $ipInfo = Http::get('http://ip-api.com/json')->json();

    render(<<<HTML
        <div class="px-1 my-1">
            <span class="mr-1">
                IP Address:
            </span>
            <span class="px-1 bg-blue-300 text-black">{$ipInfo['query']}</span>
            <div class="mt-1">
                <div class="flex space-x-1">
                    <span class="font-bold">Country</span>
                    <span class="flex-1 content-repeat-['.'] text-gray"></span>
                    <span class="text-green">{$ipInfo['country']}</span>
                </div>
                <div class="flex space-x-1">
                    <span class="font-bold">Region</span>
                    <span class="flex-1 content-repeat-['.'] text-gray"></span>
                    <span class="text-green">{$ipInfo['regionName']}</span>
                </div>
                <div class="flex space-x-1">
                    <span class="font-bold">City</span>
                    <span class="flex-1 content-repeat-['.'] text-gray"></span>
                    <span class="text-green">{$ipInfo['city']}</span>
                </div>
                <div class="flex space-x-1">
                    <span class="font-bold">Timezone</span>
                    <span class="flex-1 content-repeat-['.'] text-gray"></span>
                    <span class="text-green">{$ipInfo['timezone']}</span>
                </div>
                <div class="flex space-x-1">
                    <span class="font-bold">ISP</span>
                    <span class="flex-1 content-repeat-['.'] text-gray"></span>
                    <span class="text-green">{$ipInfo['isp']}</span>
                </div>
            </div>
        </div>
    HTML);
}
ဒီနေရာမှာ
<div class="flex space-x-1">
  <span class="font-bold">Timezone</span>
  <span class="flex-1 content-repeat-['.'] text-gray"></span>
  <span class="text-green">{$ipInfo['timezone']}</span>
</div>
ဒီအပိုင်းလေးကို ရှင်းပါမယ်။
flex သုံးထားတာက သူ့ထဲက item တွေကို အလျှားလိုက်ပြချင်လို့ပါ။ ဒုတိယ span tag မှာ သုံးတာတဲ့ flex-1 content-repeat-['.'] က နေရာလွတ်တွေ အကုန်လုံးကို ... တွေနဲ့ ဖြည့်ချင်လို့ပါ။ ဒါဆိုရင် အခုလို UI ကို ရပါပြီ။

Standalone Application
Standalone app တစ်ခုဖြစ်ဖို့
php ipinfo app:build ipinfoအခုလို build လုပ်လို့ ရပါတယ်။
ဒါဆိုရင် builds folder အောက်မှာ ipinfo ဆိုတဲ့ standalone app တစ်ခုရပါပြီ။ Standalone app ကို အခုလို run ကြည့်လို့ရပါတယ်။
cd builds
./ipinfo
Distribute via Packagist
အရင်ဆုံး composer.json မှာ အခုလိုပြင်ပါမယ်။
{
-   "name": "laravel-zero/laravel-zero",
+   "name": "pyaesoneaung/ipinfo",
-   "description": "The Laravel Zero Framework.",
+   "description": "Instant IP Insights from Your Terminal!",
-   "keywords": ["framework", "laravel", "laravel zero", "console", "cli"],
+   "keywords": ["ip", "cli"],
-   "homepage": "https://laravel-zero.com",
+   "homepage": "https://github.com/PyaeSoneAungRgn/ipinfo",
    "type": "project",
    "license": "MIT",
    "support": {
-       "issues": "https://github.com/laravel-zero/laravel-zero/issues",
-       "source": "https://github.com/laravel-zero/laravel-zero"
+       "issues": "https://github.com/PyaeSoneAungRgn/ipinfo/issues",
+       "source": "https://github.com/PyaeSoneAungRgn/ipinfo"
    },
    "authors": [
        {
-           "name": "Nuno Maduro",
-           "email": "enunomaduro@gmail.com"
+           "name": "Pyae Sone Aung",
+           "email": "pyaesoneaungrgn@gmail.com"
        }
    ],
    "require": {
        "php": "^8.1",
        "guzzlehttp/guzzle": "^7.5",
        "illuminate/http": "^10.0",
-       "laravel-zero/framework": "^10.0.2",
        "nunomaduro/termwind": "^1.15.1"
    },
    "require-dev": {
        "laravel/pint": "^1.8",
        "mockery/mockery": "^1.5.1",
+       "laravel-zero/framework": "^10.0.2",
        "pestphp/pest": "^2.5"
    },
    "autoload": {
        "psr-4": {
            "App\\": "app/",
            "Database\\Factories\\": "database/factories/",
            "Database\\Seeders\\": "database/seeders/"
        }
    },
    "autoload-dev": {
        "psr-4": {
            "Tests\\": "tests/"
        }
    },
    "config": {
        "preferred-install": "dist",
        "sort-packages": true,
        "optimize-autoloader": true,
        "allow-plugins": {
            "pestphp/pest-plugin": true
        }
    },
    "minimum-stability": "stable",
    "prefer-stable": true,
-   "bin": ["ipinfo"]
+   "bin": ["builds/ipinfo"]
}
ဒီနေရာမှာ name က အခုလို pyaesoneaung/ipinfo composer require လုပ်ရင်သုံးဖို့ပါ။
ပြီရင် box.json မှာ အခုလိုပြင်ပါမယ်။
{
    "chmod": "0755",
    "directories": [
        "app",
        "bootstrap",
        "config",
        "vendor"
    ],
    "files": [
        "composer.json"
    ],
    "exclude-composer-files": false,
+   "exclude-dev-files": false,
    "compression": "GZ",
    "compactors": [
        "KevinGH\\Box\\Compactor\\Php",
        "KevinGH\\Box\\Compactor\\Json"
    ]
}
ဘာလို့ အခုလိုပြင်ရလည်း သိချင်ရင် ဒီမှာ သွားကြည့်လို့ရပါတယ်။
ပြီးရင်တော့ ပြန် build လုပ်ဖို့လိုပါတယ်။
php ipinfo app:build --build-version=v1.0.0ပြီးရင်တော့ github မှာ repo တစ်ခုဆောက်ပြီး v1.0.0 ဆိုပြီး release လုပ်ပါမယ်။
git init
git add .
git commit -m "wip" # commit တွေကို wip လို့ပေးတာ မကောင်းပါဘူး :3

git remote add origin git@github.com:PyaeSoneAungRgn/ipinfo.git
git branch -M main
git push -u origin main
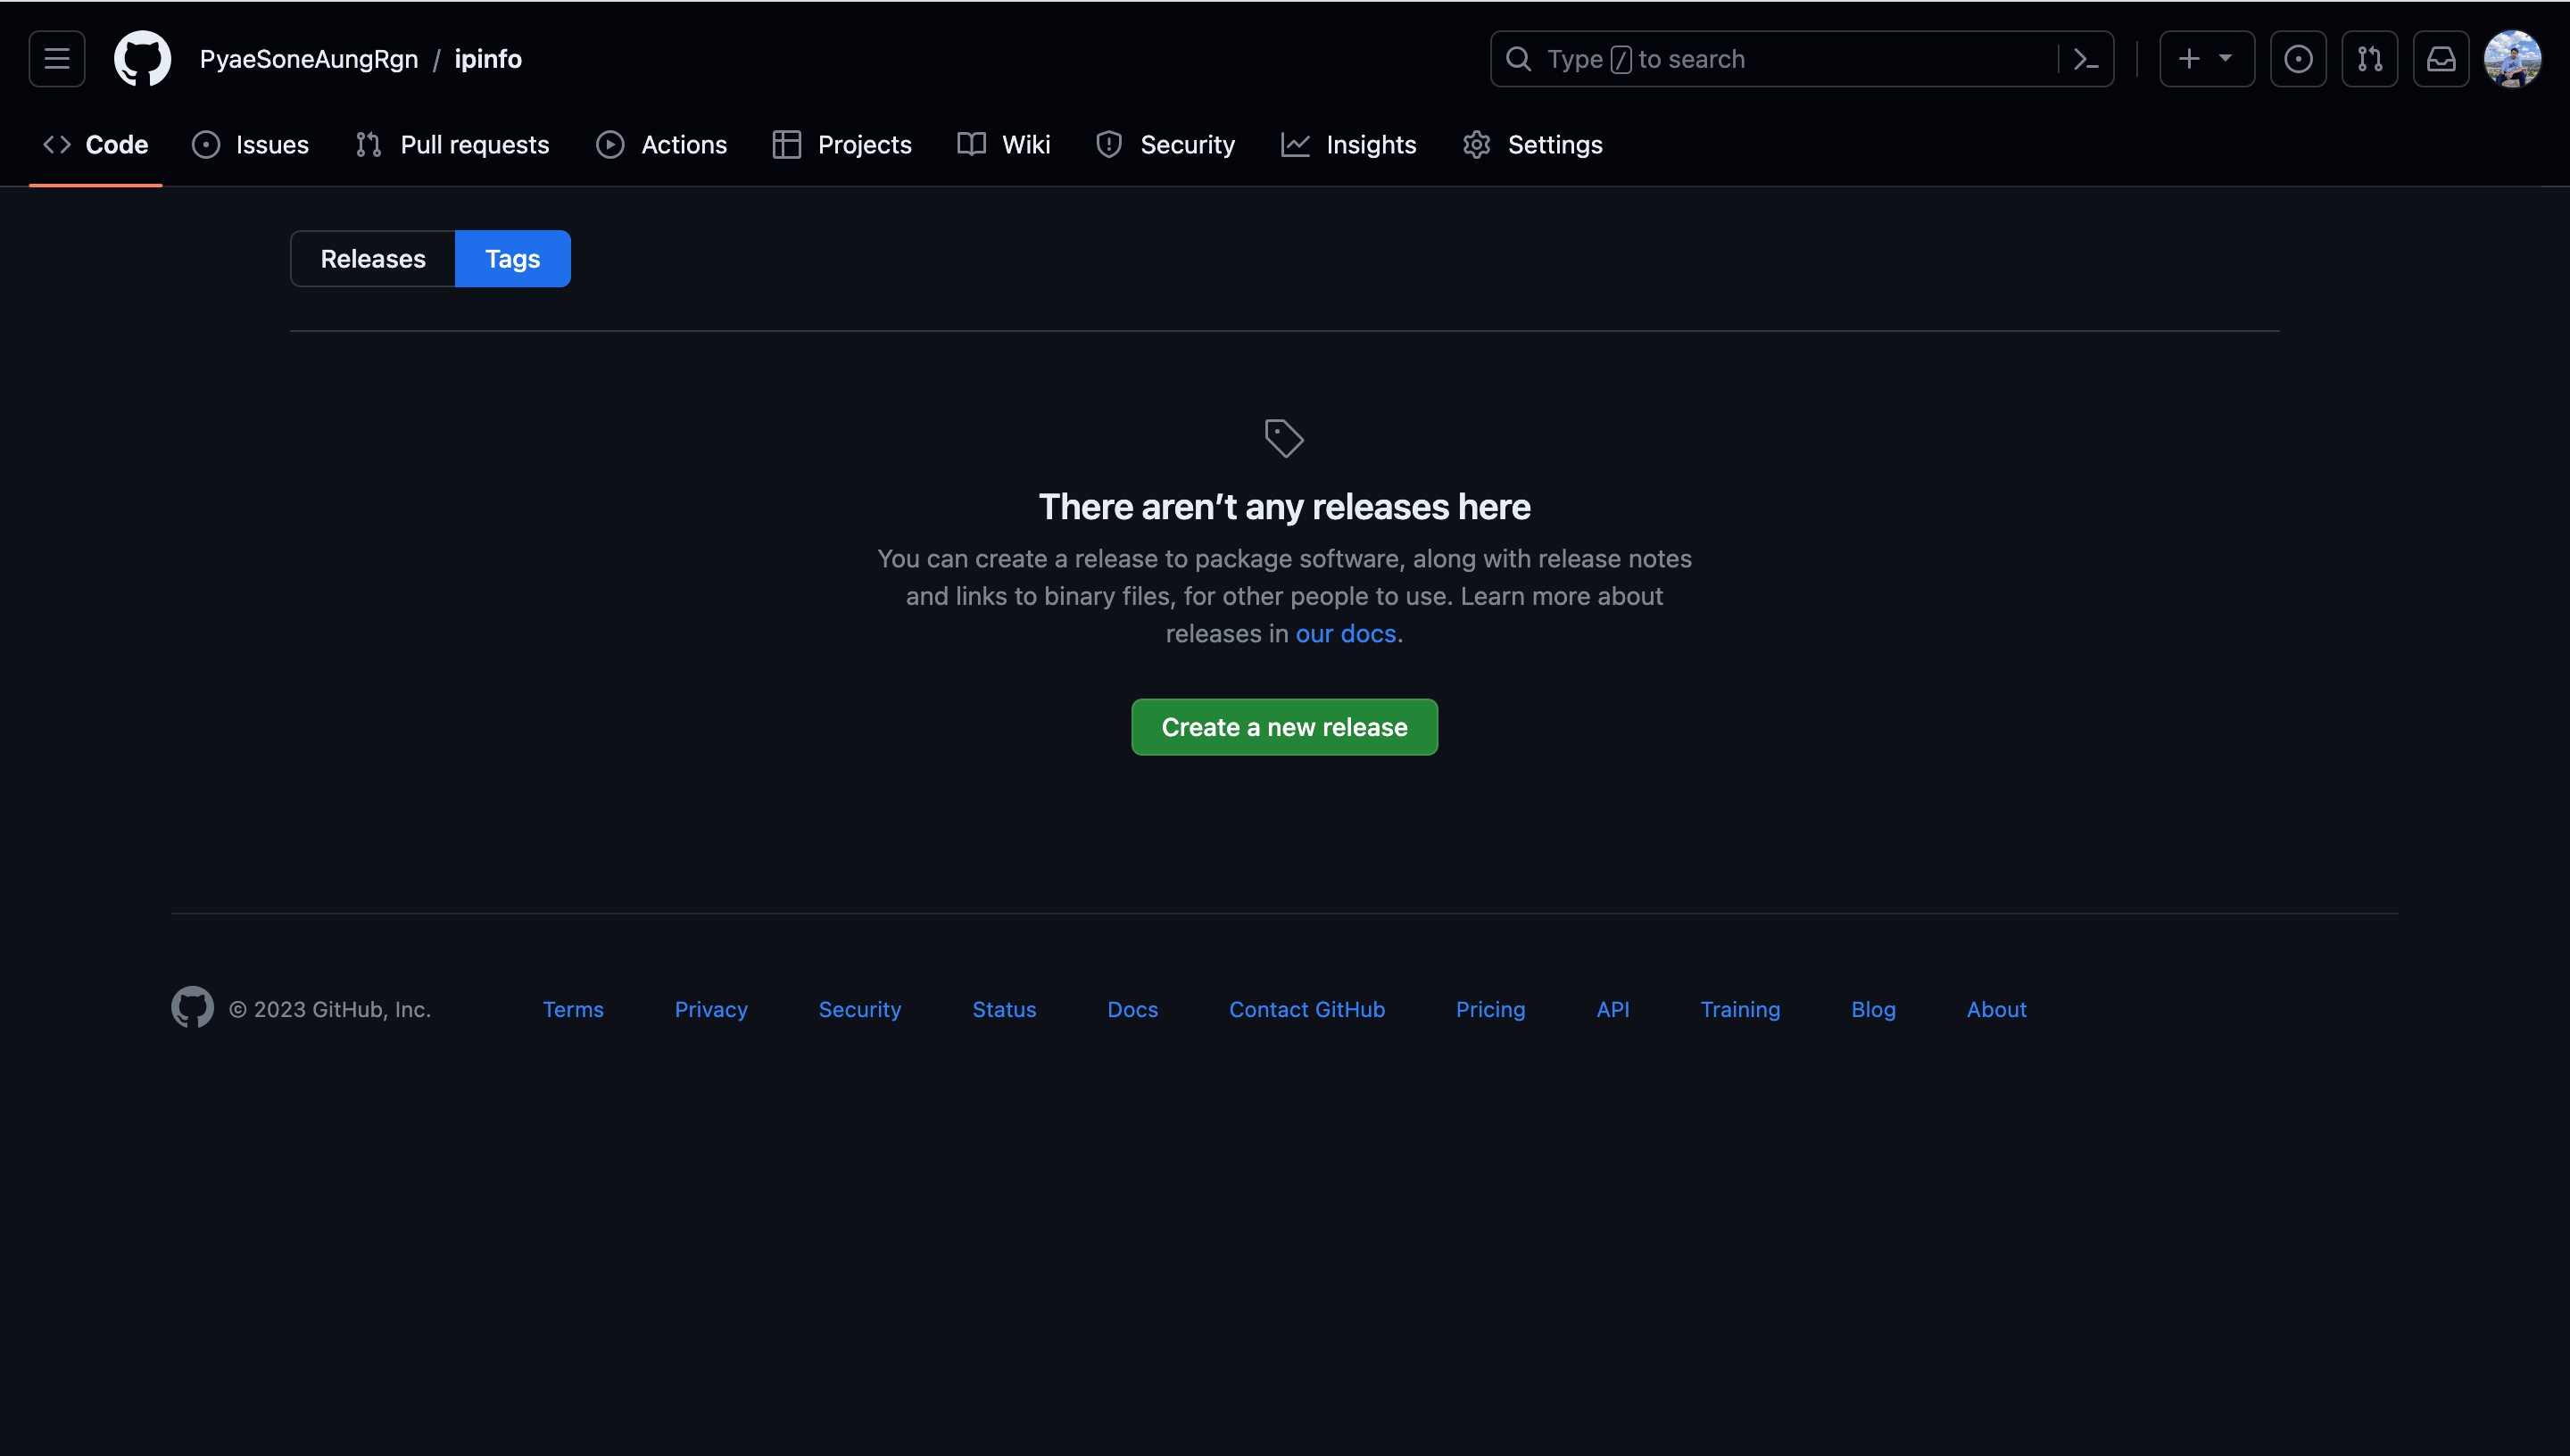
ပြီးရင်တော့ github ကိုသွားပြီး အခုလိုလုပ်ပါမယ်။

0 tags ကို နှိပ်ပါမယ်။

Create a new release

Choose a tag မှာ v1.0.0 ဆိုပြီး tag တစ်ခု create လုပ်ပါမယ်။

Title နဲ့ description မှာ အဆင်ပြေတာ ရေးလို့ရပါတယ်။
ပြီးရင်တော့ packagist.org မှာ submit သွားလုပ်ပါမယ်။

ဒါပြီးရင်တော့ ဘယ်စက်မှာ မဆို
composer global require pyaesoneaung/ipinfoipinfoဆိုပြီး သုံးလို့ရပါပြီ။
ဒါဆိုရင်တော့ Laravel Zero ကိုသုံးပြီး ကိုယ့်စိတ်ကြိုက် cli app တွေ ဖန်တီးနိုင်မယ်လို့ ထင်ပါတယ်။ Laravel Zero မှာ တခြား feature တွေ အများကြီးရှိပါသေးတယ်။ Official Documentation မှာ ဆက်လက် လေ့လာလို့ ရပါတယ်။
Code တွေကို refactor လုပ်တာနဲ့ test တွေရေးပြီး GitHub Action setup လုပ်တာကို အချိန်ရရင် ဆက်ရေးသွားပါမယ်။